Leftover Pies?


Our friend Latoola, recently contacted us with an interesting story about her latest cooking creation.

Latoola's annual Thanksgiving dinner must include apple, pumpkin, and pecan pies. Her husband insists on it even though she protests that only the apple pie typically gets eaten, and she tosses the bulk of the pumpkin and pecan pies into the trash after giving him a week to refuse any more desserts.

This year, Latoola got inspired a week after Thanksgiving in her quest to avoid wasteful tossing of food into the trash bound for a landfill instead of for someone?s palate. So, she created caakies, a combination of an individual cake and a cookie, made from the leftover pies.

Beware: this is not an exact recipe. It's a cooking style that relies on sound instincts on the cook's part. Here's what Latoola did, but says you can modify at will and still get good results:

Since her pumpkin pie was made from canned pumpkin pretty much following the recipe on the label but substituting sweetened condensed milk instead of canned evaporated milk and baked in a graham cracker crust, she just dumped the three-fourths of the pie she had left into a mixing bowl and started stirring.

Then, she scraped the remaining two-thirds of the store-bought pecan pie from its too-thick crust and mixed that real good. Next step was to mix about a half cup of all-purpose flour with about a half cup of light brown sugar, then blend that into the pie mixture, after which she added about a quarter cup of honey, three-quarters cup of chocolate chips, about a half cup of coconut, and about a cup full of mixed dried fruit that included raisins, pineapples, cherries, and cranberries.

She dropped the mixture in "dollops" on a buttered clay baking dish and baked for about 12 minutes at 350 degrees, watching carefully for the edges and tops of the randomly shaped caakies to turn light brown. 


She cooled them slightly on a wire rack and test-tasted to her delight. She reports the warm caakies were superb, but she was even more delighted when her husband arrived home and devoured three of them in their cooled version.

A hit!

Latoola says the same creative cooking technique could be applied to a leftover sweet potato pie with any variety of interesting ingredients including oatmeal, granola, and your favorite varieties of nuts (got some leftover from a holiday party you aren't sure what to do with?). Or, spice it up a bit with fresh natural nutmeg seed.

As they come out of the oven, personalize them even more using that excess holiday candy. Press a chocolate kiss, a bite-size peanut butter cup, or a piece of candy corn into them. For simplicity, you might even just sprinkle on a little white powdered sugar. If you are feeling super creative, mix up a batch of frosting (or cheat by using the store-bought kind) and slap two caakies together.

Latoola says she's likely going to make pumpkin and pecan pies for Christmas and might even hide them after a couple of slices have been removed so she can make caakies for New Year's with very little planning, shopping, and effort.

Bet you could serve it with ice cream, but be sure you also offer your guests a fresh brewed cup of Thai coffee or tea or Tortuga gourmet coffee.


Michael S. DeVries is the Founder of I-ShopTheWorld.com (http://www.I-ShopTheWorld.com) where You Save Money on Unique Native Products Direct to You from All over the World! Find these and Many More Recipes and Creative Cooking Ideas at: http://i-shoptheworld.com/topics/recipes-and-cooking/

History of Thanksgiving


The Pilgrims left Plymouth, England, on September 6, 1620. Their destination? The New World. Although filled with uncertainty and peril, it offered both civil and religious liberty.
For over two months, the 102 passengers braved the harsh elements of a vast storm-tossed sea. Finally, with firm purpose and a reliance on Divine Providence, the cry of "Land!" was heard.Arriving in Massachusetts in late November, the Pilgrims sought a suitable landing place. On December 11, just before disembarking at Plymouth Rock, they signed the "Mayflower Compact" - America's first document of civil government and the first to introduce self-government.
Pumpkins. Photo copyrighted.After a prayer service, the Pilgrims began building hasty shelters. However, unprepared for the starvation and sickness of a harsh New England winter, nearly half died before spring. Yet, persevering in prayer, and assisted by helpful Indians, they reaped a bountiful harvest the following summer.
The grateful Pilgrims then declared a three-day feast, starting on December 13, 1621, to thank God and to celebrate with their Indian friends. While this was not the first Thanksgiving in America (thanksgiving services were held in Virginia as early as 1607), it was America's first Thanksgiving Festival.
Artist's depiction of the first Thanksgiving. Courtesy of Films for Christ.
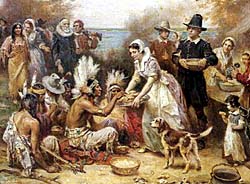
Pilgrim Edward Winslow described the Pilgrims' Thanksgiving in these words:

"Our harvest being gotten in, our Governor sent four men on fowling [bird hunting] so that we might, after a special manner, rejoice together after we had gathered the fruit of our labors. They four in one day killed as much fowl as... served the company almost a week... Many of the Indians [came] amongst us and... their greatest King, Massasoit, with some ninety men, whom for three days we entertained and feasted; and they went out and killed five deer, which they brought... And although it be not always so plentiful as it was at this time with us, yet BY THE GOODNESS OF GOD WE ARE... FAR FROM WANT."
George Washington, first President of the United States. Photo courtesy of Films for Christ.In 1789, following a proclamation issued by President George Washington, America celebrated its first Day of Thanksgiving to God under its new constitution. That same year, the Protestant Episcopal Church, of which President Washington was a member, announced that the first Thursday in November would become its regular day for giving thanks, "unless another day be appointed by the civil authorities." Yet, despite these early national proclamations, official Thanksgiving observances usually occurred only at the State level.Much of the credit for the adoption of a later ANNUAL national Thanksgiving Day may be attributed to Mrs. Sarah Joseph Hale, the editor of Godey's Lady's Book. For thirty years, she promoted the idea of a national Thanksgiving Day, contacting President after President until President Abraham Lincoln responded in 1863 by setting aside the last Thursday of November as a national Day of Thanksgiving. Over the next seventy-five years, Presidents followed Lincoln's precedent, annually declaring a national Thanksgiving Day. Then, in 1941, Congress permanently established the fourth Thursday of each November as a national holiday.
Abraham Lincoln statute, Lincoln Memorial, Washington, D.C. Photo courtesy of Wallbuilders.


As Americans celebrate Thanksgiving each year, we hope they will retain the original gratefulness to God displayed by the Pilgrims and many other founding fathers , and remember that it is to those early and courageous Pilgrims that they owe not only the traditional Thanksgiving holiday but also the concepts of self-government, the "hard-work" ethic, self-reliant communities, and devout religious faith.

Your Thanksgiving Party: Day of Preparations

Are you in the mist of planning a Thanksgiving party? When it comes to Thanksgiving parties, a large amount of focus is placed on the planning and the preparation. While it is always advised that you plan and prepare for your party in advance, there are some things that just cannot be done until the last minute or, at least, the day of your party. That is why it may be a good idea to familiarize yourself with the last minute party preparations that you will have to make.

Depending on the size of your Thanksgiving party, you may need to make additional accommodations for your guests. These accommodations may likely include seating arrangements. If you need to set up additional tables and chairs, it may be a good idea to save that task until the day of your Thanksgiving party. This will prevent your home from being cluttered with additional tables and chairs; tables and chairs that may very well be in your way.

Since a Thanksgiving party is not complete without Thanksgiving decorations, there is a good chance that you will be decorating your home. If you do choose to decorate your home, for your Thanksgiving party, you may want to leave the decorations until the last minute. Of course, you can always put your decorations up early, if you want to, but there are a number of benefits to leaving them down until the day of your party. Those benefits include the lack of dust that will accumulate on those decorations and the less likelihood of them getting damaged before your party even begins.

If you decided to incorporate a Thanksgiving dinner into your Thanksgiving party, you may have prepared some of your foods and side dishes early. While you can prepare a number of dished in advance, there are some that need to be made at the last minute. Whether you are cooking a turkey or preparing a fresh salad, you may need to do your cooking on the day of, likely the morning of, your party. Even if you are just serving snacks and drinks at your party, you will want to wait until that day to start setting them out.

Another task that you may want to leave until the day of your party is the cleaning of your home. While you can also start to prepare your home a few days before your party is set to take place, there are some cleaning tasks that you may want to leave until the last few hours. These tasks may include a quick dusting, as well as a quick vacuum. Waiting until the day of your Thanksgiving party to sweep or vacuum your home will help to ensure that your home is as clean as it could possibly be.

In addition to the above mentioned tasks, you will likely find that there are number of other tasks that you may like to complete on the day of your Thanksgiving party. If you are currently in the planning stages, it may be a good idea to develop a party checklist or a party planning schedule. This may make it easier to decide what you should and shouldn’t save until the day of your Thanksgiving party. In addition to giving you a set schedule to follow, you will also likely find that planning your party ahead of time, even at the last minute, will make it easier for you to enjoy yourself, even before your Thanksgiving party begins.

How to Carve a Turkey


To someone who is just learning to cook, this topic may seem like one of the hardest meals you will ever have to prepare. Needless to say, if you’re having a turkey there’s usually company involved which means a number of hungry people are relying on you to prepare a great meal. This can be very intimidating. Luckily we have all the information you need, in order to ensure a great meal for you, your friends and your family.

In order to successfully carve a turkey, you will need to have the following pieces of equipment:

• One warm serving platter
• A pair of kitchen scissors
• An electric knife or a large slicing knife (you may want to choose a manual knife since they provide more control than electric ones)
• A small carving knife or fork for arranging and serving the meat

Now that you have the equipment you need to carve the turkey, follow these steps in order to become a turkey carving expert:

1. Leave the turkey to sit 20-30 minutes after roasting and before carving. This will make the meat moister and easier to cut.

2. After the turkey has sat for the time indicated above, transfer the turkey onto a cutting board; this is where you will begin carving the turkey.

3. Remove the Leg: To do this, hold the drumstick firmly with your fingers and gently pull the meat away from the body of the turkey. While doing this, cut through the skin between the leg and the body. Next, cut through the joint joining the leg to the backbone. Then separate the drumstick and thigh by cutting downwards through the joint, until the knife hits the cutting board.

4. Slicing the Drumstick (Leg) Meat: Once you have detached the leg from the rest of the body, you will want to slice the meat. Hold the drumstick in an upright position and turn the drumstick in a circular motion while cutting downwards. This will produce tasty slices of meat which are approximately equal size.

5. Slicing the Thigh Meat: When slicing thigh meat, you want to hold it close to the plate and secure it so it does not move. For best results when cutting thigh meat, make sure your knife is parallel to the bone and cut downwards towards the plate in slow, steady motions.

6. Slicing the Breast Meat: Make a deep cut into the breast of the turkey towards the body frame, as close to the wing as you can. Starting at the front of the turkey (about halfway up the breast) start cutting downwards, parallel to the cut you made to the wing. Only cut enough meat as you think necessary for the amount of people. Uncut meat will stay fresher longer.

7. Serve the Turkey: place all the slices of meat in an attractive manner on a large platter and serve to your guests.

* Note: Remove stuffing from the turkey either by taking it out of the hole made where the leg was removed or by making a new hole in the neck and taking it out from there.

About the author:
Mike Lansing is a retired chef who spent most of his time as a Head Chef in New Orleans after training in France. He spends his free time cooking for family and friends, as well as serving as a contributing editor for CookingSchools101.com which offers information onCulinary Schools and obtaining a Culinary Degree for those wishing to enter the trade.


Cajun Cornbread Stuffing


Ingredients

  • 2 cups unbleached all-purpose flour
  • 2 cups stone ground cornmeal
  • 2 tablespoons baking powder
  • 1 teaspoon salt
  • 4 tablespoons white sugar
  • 5 eggs, beaten
  • 6 tablespoons butter, melted
  • 3 cups buttermilk
  • 2 tablespoons salt
  • 2 teaspoons ground white pepper
  • 2 teaspoons ground black pepper
  • 2 teaspoons cayenne pepper
  • 2 teaspoons onion powder
  • 4 teaspoons dried oregano
  • 2 teaspoons dried thyme
  • 6 tablespoons chopped fresh basil
  • 4 bay leaves
  • 1 cup minced onion
  • 1 cup chopped green onions
  • 1 cup chopped parsley
  • 2 cups chopped red bell pepper
  • 2 green chile peppers, chopped
  • 2 tablespoons minced garlic
  • 1 cup butter
  • 2 cups chicken broth
  • 1 tablespoon hot pepper sauce
  • 2 cups evaporated milk
  • 7 eggs, beaten

Directions

  1. To Make Cornbread: Preheat oven to 375 degrees F (190 degrees C). Butter a 13x9 inch pan.
  2. Combine the flour, cornmeal, baking powder, 1 teaspoon salt, and sugar, and mix well.
  3. Combine the 5 eggs, 6 tablespoons melted butter, and buttermilk. Add wet to dry while mixing on low with a mixer. Mix just until no dry ingredients remain. Pour into prepared pan.
  4. Bake until top is browned and a toothpick comes out clean, about 55 minutes. Allow to cool completely.
  5. To Make Stuffing: In a small bowl combine the 2 tablespoons salt with the white pepper, black pepper, cayenne pepper, onion powder, oregano, thyme, basil, and bay leaves.
  6. In another bowl combine the minced onions, green onions, parsley, red or green peppers, chili peppers, and garlic.
  7. Melt 1 cup butter in a large fry pan. Add the spices and cook for a few minutes. Add the vegetables and cook about 5 minutes. Do not allow the vegetables to brown. Add the stock and Tabasco. Stir and cook 5 minutes more. Crumble the cornbread into the skillet and mix. Add the evaporated milk and 7 eggs OFF THE HEAT. Make sure to stir well when adding the eggs. Return to low heat and cook, stirring, for about 2 minutes. Remove the bay leaves. Place stuffing in a bowl and cover. Cool before stuffing turkey.

Cooking Turkey using a Cheesecloth Cover


  • Ingredients   (for a 14 pound (+/-) Turkey)        


    • 1 large (bunch) fresh parsley
    • large (bunch) fresh sage
    • 1 large (bunch) fresh thyme
    • 2 teaspoon(s) kosher salt
    • 1 teaspoon(s) table salt, (can be substituted for above ingredient)
    • 1 teaspoon(s) coarsely ground black pepper
    • 1  lemon, cut in half
    • 2 small onions, cut into quarters, and other vegetables to your taste
    • 1 cup(s) dry white wine
    • 1 can(s) (14 1/2 ounces, 1 3/4 cups) chicken broth

    • Heat the butter, wine, squeezed lemon, in a small saucepan until the butter is melted. Figure out the size of cheesecloth you need to make about a 4-layer covering for your turkey. Soak the cheesecloth in the wine/butter/lemon mix.
    • Remove the neck and giblets (gizzard, heart,liver) from the turkey. If you've never cooked a turkey before, you'll find these by reaching into the cavities of the turkey. Typically the neck is in one side and a bag of parts in the other. If the turkey's legs are held together by wire, slip them out, remove the innards, then put the legs back in the wire. Keep these to make some broth for your gravy (except for the liver, the really dark dark meat.). Rinse your turkey and pat dry with paper towels.
    • Heat the oven to 450. Put the turkey on a rack in a roasting pan, breast side up. Rub entire turkey with soft butter. Put mix of vegetables, a quartered onion, chicken broth, and some salt and pepper on the bottom of the turkey pan . Put the turkey rack over the vegetable mix to space the turkey above the mix.
    • Stuff with your favorite stuffing mix, or homemade stuffing( but don't over-stuff). Sprinkle the top with salt, pepper, and all the other spices.
    • Take the cheesecloth out of the wine/butter/lemon mix, drain the cheesecloth out while  leaving moist,  and lay it over the turkey, covering it completely.
    • Put the turkey into the oven , legs toward the back if your pan will fit that way.
    • Every 30 minutes baste the turkey with the wine/butter/lemon mix.
    • In the meantime, put the turkey neck and gizzards in a saucepan and cover with 6 cups of water or so. Add a half a carrot, half an onion, stalk of celery, and some salt and pepper. Bring to a simmer, cover partway, and let it cook for a few hours to get some good broth for your gravy.
    • Reduce the heat to 350 and cook another couple of hours. The USDA has an informative page on how to thaw and cook turkeys or check the cooking directions on your turkey. It all varies depending on how large a turkey you have and what temperature you decide to use. Use a meat thermometer at the end to verify.
    • About an hour before you think the turkey will be done, take it out of the oven and remove the cheesecloth. Baste again and put the uncovered turkey back in the oven and baste again after 30 more minutes. At this point you may cover the turkey legs and wings with aluminum foil to prevent overcooking of these parts.
    • Check the temperature at the thickest part of the thigh with a meat thermometer. The leg should register 170-175F and one in the breast 160-165. Let the turkey sit 30 minutes before carving.
    • This finished turkey should be moist and very tasty....


High Altitude Cooking Info

At high altitude, the air density is lower than at sea level.

This causes two basic problems:

First at higher elevations, water boils at a lower temperature, thus requiring you to cook longer once you hit boiling (and the time it takes you to prepare your recipe). For example, the water's not as hot in Denver as it is in Boston, even boiling. This is the reason, when cooking in the mountains, your coffee and hot chocolate can be merely tepid, even though the water was boiling.

Second baked goods tend to rise faster, requiring a change in the proportion of ingredients used in leavened foods (such as breads and cakes). Sometimes, you may need to adjust the baking temperature in your oven as well!

However, changes in altitude do not affect oven temperatures.

Note: Since baking items often rise quicker at higher altitudes, you may want to increase the oven temperature. So, at elevations over 3500 feet, the oven temperature for batters and doughs should be 25 degrees Fahrenheit higher than the temperature used at sea level. Proofing time for yeast breads should be reduced.

As you may know air pressure at sea level is roughly 15 pounds per square inch. Since there are a few miles of air above us, lots of stuff (molecules) in the air is all pulled to the earth by gravity. For example, when you go up in the atmosphere a mile (5,280 ft.) you have much less air pressure (i.e. much less air pressing down on you). The same is true for being underwater: the closer to the surface you are, the less pressure you feel in your ears; the deeper you go, the greater the pressure. Any reaction that causes expansion (like giving off gases as part of a chemical reaction), will happen slower the closer one is to sea level, since the air pressure surrounding the reaction is greater. But as one goes up in the atmosphere, the surrounding air pressure is less. Therefore expanding processes (like rising bread) would seem to happen faster and maybe more profusely.

Boiling:

In general, then, if you are making something that needs to be boiled, the cooking process will take longer at high altitudes than at sea level. At as low as 5,000 feet (1,500 meters), the boiling point of water has changed enough to change cooking times significantly. For example, expect rice cooked at 5,000 feet (1,500 meters) to take 25-30 minutes instead of 20-25 minutes of simmering before the water is absorbed and the rice is done.

Baking:

For any baked goods that rise (yeast breads, cakes or breads made with baking powder, etc.), it is important to adjust the recipe so that the rapid rise time doesn't make the resulting bread or cake too dry.

This can be done as follows:

For Yeast Breads: Yeast breads rise more quickly at high altitudes, so be sure to watch your dough carefully and judge the rise time by the change in the dough's bulk, not by the amount of time it takes.

For Recipes Using Baking Powder:

Don't overbeat the eggs. Overbeating adds too much air to the bread or cake.

Raise the baking temperature slightly; the faster cooking time will keep the recipe from rising too much.

Decrease the amount of baking powder slightly; this also prevents the recipe from rising too much.

Always grease your baking pans thoroughly, as cakes and breads tend to stick more when they are baked at high altitudes.


Read the Directions!

When all else fails, read the directions! If you're baking something you've baked for years, take a close look to find any instructions about preparing your food at a higher elevation. Usually, there will be a note (in fine print) stating what to add or delete from the recipe to make your food come out just like you've always enjoyed it!

Baking Cakes at High Altitude

Most cake recipes for sea level need no modification up to the altitude of 3,000 feet. Above that, it is often necessary to adjust recipes slightly. Usually, a decrease in leavening or sugar (or both) and an increase in liquid are needed.

Each or all of these adjustments may be required for every recipe is different in its balance of ingredients. Only repeated experiments with each recipe can give the most successful proportions to use. Simply use the guide below to adjust your recipe as needed. Where two amounts appear in the table, the smaller adjustment should be tried first. Then if the cake still needs improvement, the larger adjustment can be used the next time.

Adjustment for 3000+ feet:

Add an additional egg to rich cakes to help keep them from falling.

Increase flour: For each cup of flour increase by 1 tblsp

Decrease fat: For each cup of fat, decrease 1 to 2 tblsp.

Reduce baking powder: For each tsp., decrease 1/8 tsp to 1/4 tsp

Reduce sugar: For each cup, decrease 0 to 1 tblsp.

Increase liquid: For each cup, add 2 to 4 tblsp.

Increasing oven temperature 15 to 25°F more will help set the batter before cells formed by leavening gases expand to much.

Here I found more information and just thought I would add to what I already have. Some of it's a repeat, but useful none the less.

Canning

Time or temperature must be increased in order to kill heat-resistant bacteria. A steam pressure canner must be used for canning meats and vegetables. Follow high altitude directions available from all County Extension Offices.

Deep-Fat-Frying

When deep-fat-frying, lower the temperature of the oil about 15 degrees here to prevent food from over-browning on the outside while being under-cooked on the inside. Baking casseroles and meats require no changes.

Cake From Scratch

Are you ready for the real challenge? A cake made from scratch! If not, continue to use box mixes and follow the high altitude suggestions. For those with sense of adventure, read on.


Above 3,000 feet in altitude the lower atmospheric pressure will affect cakes. There may be excessive rising which stretches the cell structure of the cake, making the texture coarse, or the cells can break before they set causing the cake to fall. This can usually be corrected by decreasing the amount of leavening agent and by increasing the baking temperature 15 degrees to 25 degrees. Because water in the batter evaporates quicker here, there is more of a concentration of sugar in the recipe which weakens the cell structure. Therefore we usually recommend decreasing sugar and increasing liquid. The cakes most likely to fall are those wonderful sweet, sticky, gooey rich ones. These super rich cakes may require reducing shortening by 1 or 2 tablespoons or by adding an extra egg. Some recipes will work fine without changes, others will take some experimenting. Here's a table* to give you a starting point.

Adjustment
3,000 ft.
5,000 ft.
7,000 ft.


 Adjustment


3,000 ft.


5,000 ft.


7,000 ft.

Reduce baking powder, for each tsp., decrease
 1/8 tsp.
1/8-1/4 tsp.
1/4 tsp.
Reduce sugar, for each cup, decrease
 0-1 Tbsp.
0-2 Tbsp.
1-3 Tbsp.
Increase liquid, for each cup, add
 1-2 Tbsp.
2-4 Tbsp.
3-4 Tbsp.

* Table from High Altitude Food Preparation- pamphlet 41
Angel food and sponge cakes use air for leavening. It comes from beating air into the eggs. Beat only until they form peaks that fall over - not stiff and dry, which cause the cells to collapse. Again, use less sugar and more flour and a higher baking temperature. We're often asked why we don't just add more flour and water to cake recipes like they do with box mixes. Isn't this more complicated. Have you ever tried to take some of the leavening or sugar out of a box mix? The only option on a box mix is to strengthen the cell walls by adding flour and water.

High-altitude conversion tips

To convert standard recipes into those which can be used for high-altitude baking:

Use 5% more flour - to disperse the leavening action and slow down the rapid rise of the cake.
Use 20% more water - to counterbalance the rapid evaporation of liquids at high altitudes and the extra flour added to the cake batter.
Bake about 25 degrees higher - to help "set" the cake's crust.
Reduce baking time about 20% - prevent overbaking at the higher temperature.
Fill pans 1/3 to no more than 1/2 full - to avoid batter overflow caused by rapid cake expansion.
Use cold water and large cold eggs - to give cake extra strength.
Generously grease and flour cake pans - to prevent cake from sticking.
Since high altitude cakes rise higher, remove top oven rack to prevent cake from sticking to it.
Have oven calibrated by a serviceman periodically, since some thermostats are affected by altitude.

High-altitude cookie adjustment

Only cookies with lots of chocolate, nuts or dates need adjustment: reduce baking powder/soda by 1/2.
At very high altitudes, a slight reduction of sugar may help.

This is the fun part. Since I got the information from multiple places, they all have a hint as to what is best. At best this information will help you. Trial and error may be the thing for some baking.

Thanks to the folks at the Colorado State University (Boulder), the University of Southern Colorado (Pueblo), the Colorado State County Extension Office, Safeway Stores and the USDA for there help with this section. Also, "The New High Altitude Cookbook" by Beverly M. Anderson and Donna M. Hamilton.

For more information on baking at high altitudes, ask for "High Altitude Food Preparation" Pamphlet 41 from your Colorado State County Extension Office. There is no charge. It will also list other high altitude recipe books available from Colorado State Cooperative Extension.


One of the things I enjoy with running this website. On Feb 16, 2007 I received an email that has real world adjustments.

I am located at 8000 feet above the ocean and have been baking and cooking successfully way up here for 26 years, 15 professionally.

Leavening agents, just need a smidgen of a decrease (1/8 t.) from about 400-9500 feet. Above that then yes, decrease by 1/4 t

Sugar: I have yet to decrease sugar by more than 1 T per cup, actually I just measure it to just below the cup line in the measuring device.

Liquid: from many that I have met or spoken to, those below about 4500 feet inform me that there are no true adjustments. However adding up to 4 T more of liquid without adding any extra flour could result in a soggy product. I suggest adding approx. 1-2 T per cup and a tad more above 9500 feet.

1-2 T of additional flour is a definite adjustment, especially for cookies otherwise they will become much too flat rather than nicely rounded with sustenance.

My info and knowledge is not based on scientific studies, but rather on everyday experiences in the kitchen.

I hope this info helps.

Randi Levin
The Muffin Lady Inc.

Holiday Crafts - Thanksgiving and Christmas Decoration Ideas


Turkeys are a natural choice for decorations. A familiar project at this time of year is for a child to trace around her hand and make the resulting drawing into a turkey. The thumb is the head and the fingers are the tail feathers all displayed. While many of the turkeys that are raised for food are now the domestic white variety, the turkeys eaten by the Pilgrims at the first Thanksgiving were the wild brown ones. The tail feathers on a wild turkey are brown, but they are iridescent. catching light and appearing to be multi-colored. This is why children color the tail feathers in bright colors.

The turkey's head has a wattle under the beak. This is a vertical flap of loose skin that is red colored. Be sure to draw this in order to make the hand turkey look like a turkey. Add skinny legs and bird feet. When done, the children can cut out the turkeys and hang them on the wall. It's really cute to make a whole flock of these turkeys in the sizes of all the hands in the family. The little hand shapes are particularly sweet.

Another nice turkey decoration to make when making Thanksgiving holiday crafts is a turkey door decoration. Make a brown construction paper body and head of a turkey. Now make a large number of colored feather shapes. Each family member writes on a feather something he or she is thankful for before attaching as part of the turkey's tail. Repeat until all the feathers are used, and hang the turkey on the front door to greet visitors with a message of gratitude. Make a sign to accompany the turkey that says "Give thanks to the Lord for He is good!" or simply "Be thankful!" or "We're thankful for you!" or whatever you like.

Children love making construction paper chains. To further decorate the house for Thanksgiving, let them make a paper chain in fall colors as one of their holiday crafts. Using 9 by 12 inch construction paper, cut the paper in half across the long side and cut the halves into one inch thick six inch long strips. Use a stapler to attach the ends of the strip into a circle. Loop the next strip into the circle and staple it. Continue the process alternating colors of brown, red, yellow, and orange. When the chains are long, you can drap them along the ceiling or stair rail. If you don't make the door turkey, the children can write something they're thankful for on each strip of paper before adding it to the chain.

Thanksgiving is too nice a holiday to let the other more commercial holidays crowd it out. By making holiday crafts to decorate the home for Thanksgiving, you can keep this day special, too. The extended family, aunts, uncles, grandparents, etc., will be pleased to see the holiday crafts the young ones have made to decorate the house and make it cheerful for their visit.

About the author: Brigitte Smith
Find out more about Christmas decorations, Christmas gift ideas and more athttp://www.Your-Christmas-Gift-Idea.com


Apple Pie to Love


Ingredients

Crust:
3 cups all purpose flour
1/4 cup sugar
1 1/4 teaspoons salt
1 1/4 cups (2 1/2 sticks) chilled unsalted butter, cut into 1/2-inch cubes
1/3 cup non-hydrogenated solid vegetable shortening, cut into 4 pieces, frozen
6 tablespoons (or more) ice water

Filling:
2 1/4 pounds assorted apples (such as Pink Lady, Pippin, and Golden Delicious), peeled, quartered, cored, cut into 1/2-inch-thick wedges
1/3 cup sugar
1/4 cup golden or dark raisins
2 1/2 tablespoons quick-cooking tapioca
1 1/2 teaspoons (packed) finely grated lemon peel
1/4 teaspoon salt
1/8 teaspoon freshly grated nutmeg or ground nutmeg
1 1/2 tablespoons graham cracker crumbs
2 tablespoons (1/4 stick) chilled unsalted butter, cut into1/2-inch cubes
Milk (for glaze)
1 tablespoon raw sugar*
print a shopping list for this recipe

Preparation

For crust:
Blend flour, sugar, and salt in processor. Add butter and shortening; cut in using on/off turns until mixture resembles coarse meal. Add 6 tablespoons ice water and blend just until moist clumps form, adding more ice water by teaspoonfuls if dough is dry. Gather dough into ball. Divide dough in half. Flatten each half into disk. Wrap in plastic and chill at least 3 hours. DO AHEAD: Can be made 1 day ahead. Keep chilled. Soften dough 15 minutes at room temperature before rolling out.

Butter 9-inch-diameter glass pie dish. Roll out 1 dough disk on lightly floured work surface to 12- to 13-inch round. Transfer dough to prepared pie dish and press dough onto bottom and up sides of dish, allowing overhang to extend over sides. Roll out second dough disk between sheets of parchment paper or waxed paper to 12- to 13-inch round; transfer dough to baking sheet. Refrigerate both crusts while preparing filling.

For filling:
Position rack in center of oven and preheat to 425°F. Combine all apple wedges, 1/3 cup sugar, raisins, quick-cooking tapioca, grated lemon peel, 1/4 teaspoon salt, and nutmeg in large bowl; toss to blend. Let stand at room temperature until some juices form, tossing occasionally, about 15 minutes.

Place crust-lined pie dish on rimmed baking sheet. Sprinkle graham cracker crumbs over bottom of crust. Transfer apple filling to crust, mounding filling slightly in center. Dot filling with butter cubes. Brush crust edges lightly with water. Remove top parchment sheet from second dough round. Invert dough round atop filling; remove second parchment sheet. Trim dough overhang on both crusts to 1/2 inch. Press crust edges together, then fold under. Using tines of fork, press on crust edge around rim of dish to seal decoratively. Using small sharp knife, cut six 1-inch slits in top crust, then cut out 1/2-inch circle from center of top crust to allow steam to escape. Brush top crust lightly with milk, then sprinkle with raw sugar.

Bake pie 15 minutes. Reduce oven temperature to 375°F and continue to bake pie until crust is golden, apples are tender when pierced, and juices are bubbling thickly through slits in crust, covering crust edges with foil collar if crust is browning too quickly, about 1 hour longer. Transfer pie to rack and cool to lukewarm or room temperature. Cut pie into wedges.

* Also called turbinado or demerara sugar; available at most supermarkets and at natural foods stores.

Scrapbooking Ideas For Thanksgiving: Timeless Traditions

Even though most people associate this work by Rockwell as a Thanksgiving picture, Freedom From Want actually first appeared on The Saturday Evening Post cover in the month of March. It is completely understandable why people would pick a painting such as the Norman Rockwell classic Freedom From Want as their primary source of scrapbooking ideas for Thanksgiving. After all, it has all the necessary elements for scrapbooking ideas for Thanksgiving: a family at the table, turkey, and a truly inviting atmosphere. However, some of the best scrapbooking ideas for thanksgiving don't come from the dinner setting, but everything else that happens on that day.

After all, very few people hold a Thanksgiving dinner at their house and immediately serve the guests the moment they walk through the door. Generally, most hosts realize that there will be some downtime before dinner. During this time, family members can get together and talk while the children can play. Why not make this the subject of your scrapbooking ideas for Thanksgiving pages?

This is the mistake most scrappers make when choosing their pictures for their scrapbooking ideas for Thanksgiving: they wait until the dinner to take the photos. While the dinner certain has some interesting scrapbooking ideas for Thanksgiving, the best scrapbooking ideas for Thanksgiving occur way before dinner is served. The time before the dinner is served might be the memories that your guests remember the most.

Things like the children sitting around the television watching a movie or playing a video is just one example of scrapbooking ideas for Thanksgiving. Even better are “Thanksgiving firsts" for your scrapbooking ideas for Thanksgiving. For example, someone may have brought over their newborn child for all the family to see. Certainly an event like this deserves some press. The scrapper should take some pictures of relatives seeing the child for the first time, capturing the expressions and reactions.

After all, some people may have families where the relatives live very far away, and it can be very difficult to get everyone under the same roof for any period of time. Take advantage of this time as much as you can, and don't even ask people to pose. Just take as many pictures in the natural surrounding, and in some cases the photographer does not have to acknowledge his or her presence.

Taking pictures before the dinner and putting simple frames around them is one of the easiest scrapbooking ideas for Thanksgiving. Sometimes finding a common theme in each of the photos and running with it is worth quite a bit with scrapbooking ideas for Thanksgiving. Peppered with these pictures can be traditional Thanksgiving images like red and orange leaves, pumpkins, and of course, turkeys, and it will be a guaranteed success. Years later, when the family looks at the pages, they will have memories to remember.


About The Author:
Michele Cardello, director of marketing and creative for Life Imprints, a creative scrapbooking supplies company in Cleveland, Ohio, has worked in the photo packaging industry for 10 years. Cardello helps customers find creative ways to preserve and appreciate a lifetime of memories.

Wreaths Galore - Not Just For Christmas Anymore

Wreaths are most often thought to be a Christmastime decoration. Around the holidays, many of us decorate our homes with evergreen wreaths with lights and red bows. Christmas wreaths are a traditional decoration that we're all accustomed to. However, more and more designers are using wreaths as a constantly rotating seasonal decoration. Why limit yourself to only displaying wreaths during the month of December? Wreaths can be a unique and versatile decoration for any season or holiday. Here are some fresh ideas on using wreaths as year-round decorations.

New Year's:
You can easily take your Christmas wreath into New Year's Day by removing the red bows and adding gold or silver ones with some streamers. Other possible decorations include a Happy New Years banner or hat and some small party horns or plastic champagne glasses.

Valentine's Day:
Nothing says love like a pink or red heart shaped wreath. Consider using silk roses, fabric hearts or even wrapped candies. A stuffed animal like a pink or red teddy bear, or small cupid also adds character. Top it off with a beautiful bow and you have a bright decoration for those cold winter days!

St. Patrick's Day:
Everyone can pretend to be Irish on St. Patty's Day! Of course, when designing a St. Patrick's Day wreath, green is certainly a requirement. A mass of green shamrocks wrapping your wreath would look very festive (garlands of plastic or fabric shamrocks can usually be purchased at decorating stores). Additional decorations might include small gold coins or leprechaun figurines.

Easter:
An Easter wreath can be decorated in many ways. Some choose to focus on the Christian celebration of Christ's resurrection, and others choose a lighthearted Easter Bunny theme. Whatever your choice may be, beautiful spring flowers are a good base for an Easter wreath. Other choices might include Easter eggs, chocolate candies or bunnies, and Easter ribbons.

Fourth of July:
In the United States, July 4 is an important holiday when we all like to show our patriotic spirit. Try a straw or grapevine wreath spray painted with red, white, or blue gloss paint as your base, and then have fun from there! You can use firecrackers, streamers, and ribbons for decorations. And don't forget to include some small flags to celebrate our independence.

Halloween:
After Christmas, Halloween is the most "decorated" holiday we celebrate in the United States. Welcome your trick-or-treaters with a festive Halloween wreath. Orange and black are traditional colors, and there are many materials and items you can use to create your wreath. Decorations might include pumpkins, ghosts, black cats, witches, spiders and wrapped candies.

Thanksgiving:
A wreath is a wonderful way to welcome guests to your home for a Thanksgiving dinner. Consider using natural materials this time of year, as they are so abundant. You may have to plan ahead and pick up beautiful leaves as they fall from the trees to create your own special design. A large fall bow with some colorful corn will complete your Thanksgiving wreath.

As you can see, wreaths aren't just for Christmas anymore! Seasonal wreaths are a great way to decorate for each holiday. If you have a nice base wreath, it would even be possible to just change out the decorations to accommodate each holiday or season. And because most wreaths aren't very large, they are an easy way to add a special touch to your home's decor without busting the budget. Be sure to protect your seasonal wreaths by storing them in a secure and efficient manner so that you can enjoy them for years to come.


About The Author: Ellen Bell
For more information on storing your holiday wreaths, please visit The Christmas Tree Storage Bag Shop. There you'll find a variety of wreath storage boxes and other seasonal storage products.

Holidaze: Some Helpful Tips For A Stress-Free Holiday Meal

For me, and I would guess for most people, the biggest challenge of a holiday meal is getting everything ready, on the table and keeping it all hot until people eat. It isn't an easy task. Here are a few ideas to help.

1. Get your menu together early and carefully review your recipes. Figure out what pots, pans, serving dishes and utensils you'll need. Borrow or purchase what you don't have.

2. Put together your grocery list early and remember that you'll save time if you can reduce your trips to the supermarket. If you're planning on serving turkey, consider the type of bird you're buying when you plan the timing of the supermarket trip. If you're getting a frozen turkey, you'll need to allow time for the bird to defrost. Plan on one day in the refrigerator for every 5 pounds of turkey. And if you're getting a bird that you need to pre-order, call the store early to check on their timing.

3. When you're making your grocery list, don't forget ice and beverages. And, if you think that you'll be short on refrigerator space, pick up an extra bag of ice to use for storing food in your picnic cooler.

4. Do as much as possible the day before. Wash any pots or pans, servingware or dinnerware that needs cleaning the day before. Set up extra tables and chairs. Iron the tablecloths if that's important to you.

5. And, then there is cleaning the house. Personally, I hate cleaning and I do as little as possible. So, I do what I have to and I hide the rest. Keep the doors closed to the rooms that are messy; Stow the pile of magazines and newspapers and unread mail under the bed; Stuff your husband's golf equipment that he thinks belongs in the dining room into a bedroom closet; Toss the dirty laundry into the bathtub and close the shower curtain. Done. You can check that off your list.

6. If you'll be having a lot of kids at your house, consider taking some time out the day before and setting up some games, coloring books, movies or video games in an extra room to keep the kids entertained after the meal while the adults are socializing. Remember that kids don't want to sit around and talk.

7. Keeping food warm is always a challenge when you're making a lot of dishes. Slow cookers can be used to keep things like gravy and mashed potatoes warm until serving time. A heat-proof mixing bowl set over a pan of simmering water can work for this too. Consider using heating pads under bowls and platters on the buffet table to help keep food warm. And, don't forget to use a cloth or towel down under the heating pad to protect the table's surface.

8. It can be easy to miss something in the last-minute rush to get everything on the table. Consider making a list of all the dishes that you're serving and check each item off as you get it to the table.

Exotic Ways Of Cooking Turkey.


Deep-Fryed Turkey


3 gallons peanut oil for frying, or as needed
1 (12 pound) whole turkey, neck and giblets removed
1/4 cup Creole seasoning
1 white onion


In a large stockpot or turkey fryer, heat oil to 400 degrees F. Be sure to leave room for the turkey, or the oil will spill
over.

How to determine the amount of oil you need:

The easiest way I've found to determine the amount of oil you need is to place the turkey into the fryer and fill with water until the turkey is just covered. Remove turkey and allow to drain, pat dry with paper towels as well. Make note of the level of water in the fryer. Discard water and dry throughly. Fill frying vessel with oil to the level as noted above. This should help in preventing hot oil spill overs.

Layer a large platter with food-safe paper bags. Rinse turkey, and thoroughly pat dry with paper towels. Rub Creole seasoning over turkey inside and out. Make sure the hole at the neck is open at least 2 inches so the oil can flow freely through the bird. Place the whole onion and turkey in drain basket. The turkey should be placed in basket neck end first. Slowly lower basket into hot oil to completely cover turkey. Maintain the temperature of the oil at 350 degrees F, and cook turkey for 3 1/2 minutes per pound, about 45 minutes. Carefully remove basket from oil, and drain turkey. Insert a meat thermometer into the thickest part of the thigh; the internal temperature must be 180 degrees F.

Finish draining turkey on the prepared platter.

Grilled Whole Turkey

12 pounds whole turkey
2 cups water
3 tablespoons chicken bouillon powder
2 teaspoons garlic powder
2 teaspoons onion powder
1 teaspoon poultry seasoning
1/2 teaspoon chopped parsley
1 teaspoon paprika

Prepare an outdoor grill for indirect medium heat, and lightly oil grate. Rinse turkey, and pat dry. Place turkey breast side down on the prepared grill. Sear turkey on both sides until skin is golden to dark brown. In a large roasting pan, mix together the water, bouillon powder, garlic powder, onion powder, poultry seasoning, parsley, and paprika. Place turkey breast side down in the roasting pan. Scoop the pan mixture over the turkey. Cover tightly with foil and place on grill. Grill 3 to 4 hours, until the internal temperature of the thigh reaches 180F. Remove turkey from grill and let stand 15 minutes before carving.

Smoked Turkey

1 turkey 8 to 22 lbs., fresh or completely thawed
Sweet Pickle Brine (recipe to follow)
Maple syrup

Sweet Pickle Brine:

1 gal. water
2 1/2 cups salt, rock, pickling or canning salts are recommened
1/3 cup of light brown sugar
1 tablespoon Lquid garlic
1 oz. pickling spices

Mix well. You may need to adjust the amounts depending on the size of your bird. This recipe should suit you fine for an 8 to 12 lb. turkey.

Rinse turkey thoroughly with cold water, drain and pat dry. Prepare sweet pickle brine. Brine turkey according to the following schedule,
8 to 12 lb. bird 3 days, 13 to 16 lb. bird 4 days, 17 to 22 lb. bird 5 days. Remove from brine; rinse thoroughly in cold water and pat dry. Allow to dry in refrigerator for 24 hours.

Lock wings behind back and tie legs and tail together. Baste turkey with maple syrup before putting in smoker and every 2 hours while smoking. Position turkey on cooking grill. Smoke cook until done.

The best way to determine doneness is to insert a meat thermometer into the thickest part of the turkey (the breast) the internal temperature should read 180 degrees F.

Smoking food is more an art than a science; this recipe is not intended for the novice. Allot of factors go into determining the cooking time for a particular food when smoking.

Cool turkey in the refrigerator for 24 hours before serving to enhance the smoked flavor. You may serve the turkey right away if you wish.


About The Author:
http://www.dishadvice.com http://www.dish.reprintarticlesite.com